Showing posts with label lunch. Show all posts

Friday, July 19, 2013

Doritos Crusted Chicken Breast

People usually go with cornflakes for that extra crunch with their kitchen.

BUT, why don't we use Doritos?
The good thing about this is you can go with your favourite Doritos flavour.

So, lets get to it!

What you need:
2 cups of buttermilk
2 cups of flour (plain or self raising, whatever you have at home)
5 eggs
300g Doritos
900g chicken breast (without skin and bones)
Cayenne Pepper/Chilli Flakes (Optional, Sprinkle on coasted chicken before baking)


Step 1:
Cut the Chicken breast 2.5cm cube or smaller.
Pour the buttermilk into the chicken and keep in the fridge for 2 hours.

Step 2:
While waiting, crush the doritos (you can do it inside the bag).
Tip: For finer texture, you can put them in a food processor.


Step 3:
After 2 hours, take out the chicken from the fridge.
Preheat your oven at 180C.
The routine is to coat the buttermilk-coated chicken with flour, and dip it into the egg and cover it with doritos.
Repeat the routine for all pieces of chicken.
Lay them on baking paper-lined tray.


Step 4 :
Bake the chicken for 15 minutes.
Tip: Do not forget to check the bigger piece of chicken, if they are cooked or not.
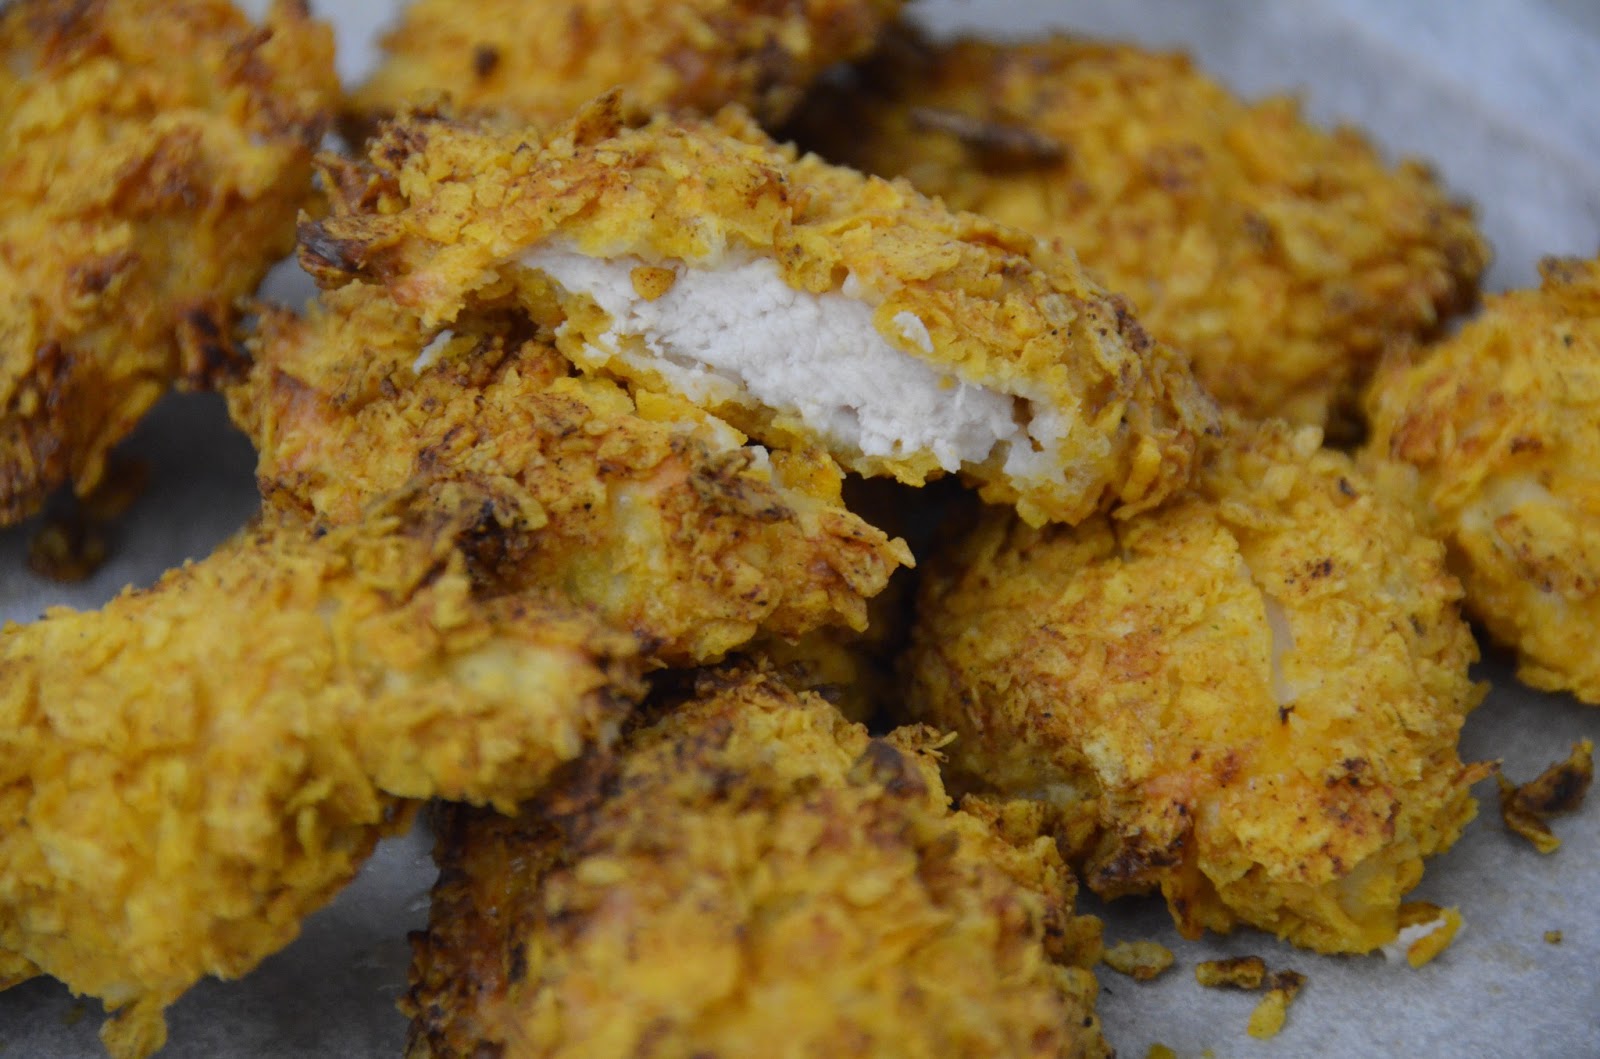

Step 5:
Serve while they are still hot with any sauce you like! Tomato, BBQ, mayonnaise, or your own homemade sauce!

ENJOY!

Until next time,


Tania xx

Thursday, May 23, 2013

Mini Bite Size Tortilla-Crust Pizza

Greetings, Food lovers!

So, instead of doing assignments, I procrastinated by making these mini bite sized pizza. So I thought, might as well blog it for people out there who's been eating Nutella sandwich while studying (Yes, you!)

Its a pizza, you practically can put anything you have in the fridge, slice em and pile em together.
This is ideal for any events, thus BE CREATIVE! You can put duck and blue cheese, if you prefer your pizza that way. :D

Ingredients
Ingredients (Clockwise):

  • Tortillas (for the base)
  • Cabanossi
  • Corn (Can be fresh or from a can)
  • Pizza sauce (you can use tomato sauce)
  • Diced Capsicum
  • Mix of tasty and mozzarella cheese
  • Chilli flakes
And you will need:
  • Cookie cutter (A can will work too, shown below)
  • Muffin Tray (Preferably the mini ones)
  • Spoon (or your finger!)
Step one:


Cut the tortillas


  •  Cut the tortilla into smaller round pieces. I dont have a round cookie cutter, I used the bottom part of a can that comes with the corn. You can use a cup, or if you have steady hand you definitely able to slice it with knife. I find it easier to heat the tortilla in a microwave (not oven!) for 25 seconds and then cut them. 
Step two:

Prepare the base

  • After cutting them into smaller pieces, place them on the muffin tray as shown above. 
Step three:

Pizza sauce

  •  Put a layer of pizza sauce on the tortilla. Not too thick, because you dont want the tortilla to go soggy (in the future). 
  • I mixed the chilli flakes with the pizza sauce, but if there are people who does not eat chilli you can just sprinkle them on top. 
  • After applying the sauce, heat the oven up to 180 degrees Celsius. 

Step four:
Assembling

  •  Throw (carefully) all the other ingredients into the tortilla. 
Step Five:

Oven time!

  •  Place them into the oven for 10 minutes, 180 C. 

TA DA!

  •  Check them between the 8th and 10th minute. I prefer my cheese to burn a little bit so I left them for the whole 10 minutes. 
Step six:

Lookin' good!

  • Leave them for a couple of minutes before picking em up. It will be easier to pick up because the tortilla will hold its shape and you don't want to burn your finger and taste buds. 

 Step seven:
DONE!

  •  And that it, Folks!
I hope you enjoy your pizza, because I certainly did! 

Until next time, 


Tania xx


Saturday, February 2, 2013

Red Ned's Gourmet Pie Bar


Red Ned's Gourmet Pies
Last weekend (Australian Day Long Weekend), my friends (Chameleonic Adornment and Encrusted Gems) and I decided to go to Port Stephens to have a lil' tan. Despite the fact that it rained cats and dogs for the whole weekend, we enjoyed our getaway. 
On the last day of the trip, we visited Red Ned's Gourmet Pies because its unique presentation and different flavour of their pies (50 of them!!)  

Ned Kelly Mannequin 
It was easy to find the pie shop and because of this life size Ned Kelly mannequin, and I'm sure you wouldn't miss it as well.     


They have so many variety, it takes a while for me to choose what I should eat. I was going to buy one of each, but I'll have to auction my camera off because there's too many of them!! 
The Pies ranging from $3.00 to $7.90, depends on what you picked. 

Chicken Cordon Bleu Bacon and Cheese
After all the argument in my head, I decided to pick Chicken Cordon Bleu Bacon and Cheese. I couldn't stop at my first bite (Lucky I took a picture before I took a bite). 
The pastry was so soft yet so crispy. I could taste the bacon, cheese and chicken, everything! Just in one bite. I didn't say a word at all while I finished my pie. It tasted soo delicious even if I was full at the time. 
It was worth getting rained for. 


Some of many Red Ned's awards


I was going to steal this doorstopper

Ned Kelly Tin Man

So thats it folks! Whenever you go to Port Stephens, don't forget to visit Red Ned's Gourmet Pie Bar! 
I for one, will definitely go back. 

Until next time, 


Tania xx

Sunday, October 21, 2012

Kitchen By Mike

Welcome!
Last week, I was able to get together with Alicia for a quick lunch (Check out her blog here). We decided to go to Kitchen by Mike which was very close to Alicia's workplace. Kitchen by Mike doesn't have any sign outside or anything for that matter. Once you get into dunning ave, the entrance is somewhere in the middle of grey-painted never-ending wall. 
Usually, this garage door will open and you can have an overview of the Kitchen and Koskela Studio (Read about this in my other post) but not today I suppose. 


Up the lil' stairs, you will spot this outdoor dining area with mixture of wood, plastic and metal furniture. This looks uncoordinated, but I call it 'organised mess'.


Plant pot for cutlery holder? Why not.

Used tomato cans. 

Antler Bell.


On the right is the entrance to Koskela Studio

I gotta say, I love high ceiling. 
This makes you wanna jump and dance. 
No, seriously. The high ceiling makes you breath better and exercise your eyesight. 
I love the idea of using this warehouse as is, a lil' bit of dirt here and there. Don't get me wrong the kitchen's quite clean inside and out. 

Crowded!
The menu changes everyday, as they use the freshest ingredients that are in season. If you want to find out what they have on the day, go to their facebook page and like it. 
They would constantly cook the food, so whenever you are there, you'll get your food. They serve pretty quickly, so don't worry if you see a long line. 
This brings back memory when you were lining up in your canteen and looking through what they have for the day (which definitely will increase your starving meter!)

$12 a loaf
If you don't want to buy a whole loaf, you can add a couple of slice to your order. 


Crispy Pork belly with chutney for $11.00 a piece
Hmmm, look at the juice dripping down. I just. got. to. zoomed. it. in. 


Feel like a glass of wine? or a bottle? 


At first we didn't realised what this means. Seconds later, we did a long AAAHHHs. Anyone get it?


I had (below): Wood fired okra, chickpeas, mint, hazelnuts and labna salad + Iceberg jalapenos smothered with tamarind dressing + Lemon and Barley juice.
Alicia had (top): Green bean, fig, hazelnut and feta salad + Pumpkin, cumin onion, and persian feta tartine on sourdough toast. 


So, that's it! Don't forget to check out my Koskela Studio post right after this. :D

Until next time,


Tania xx